
Users & Permissions
The Users & Permissions section is designed to help you effectively manage both individual users and user groups, ensuring that the right permissions and access levels are assigned across your organization. By structuring permissions through user groups, you can streamline access to specific spaces and functionalities, ensuring consistency and security.
Overview of Users and User Groups
When you enter the Users & Permissions section, you will find an overview of:
Users: A list of all users, their names, and creation dates.
Search Functionality: The ability to search for users by email or ID using the search bar at the top-right corner.
Sync Roles button: Allows synchronization of user roles across all spaces to ensure consistency.
User Groups: A list of user groups, allowing for the management of permissions for sets of users with similar access needs.
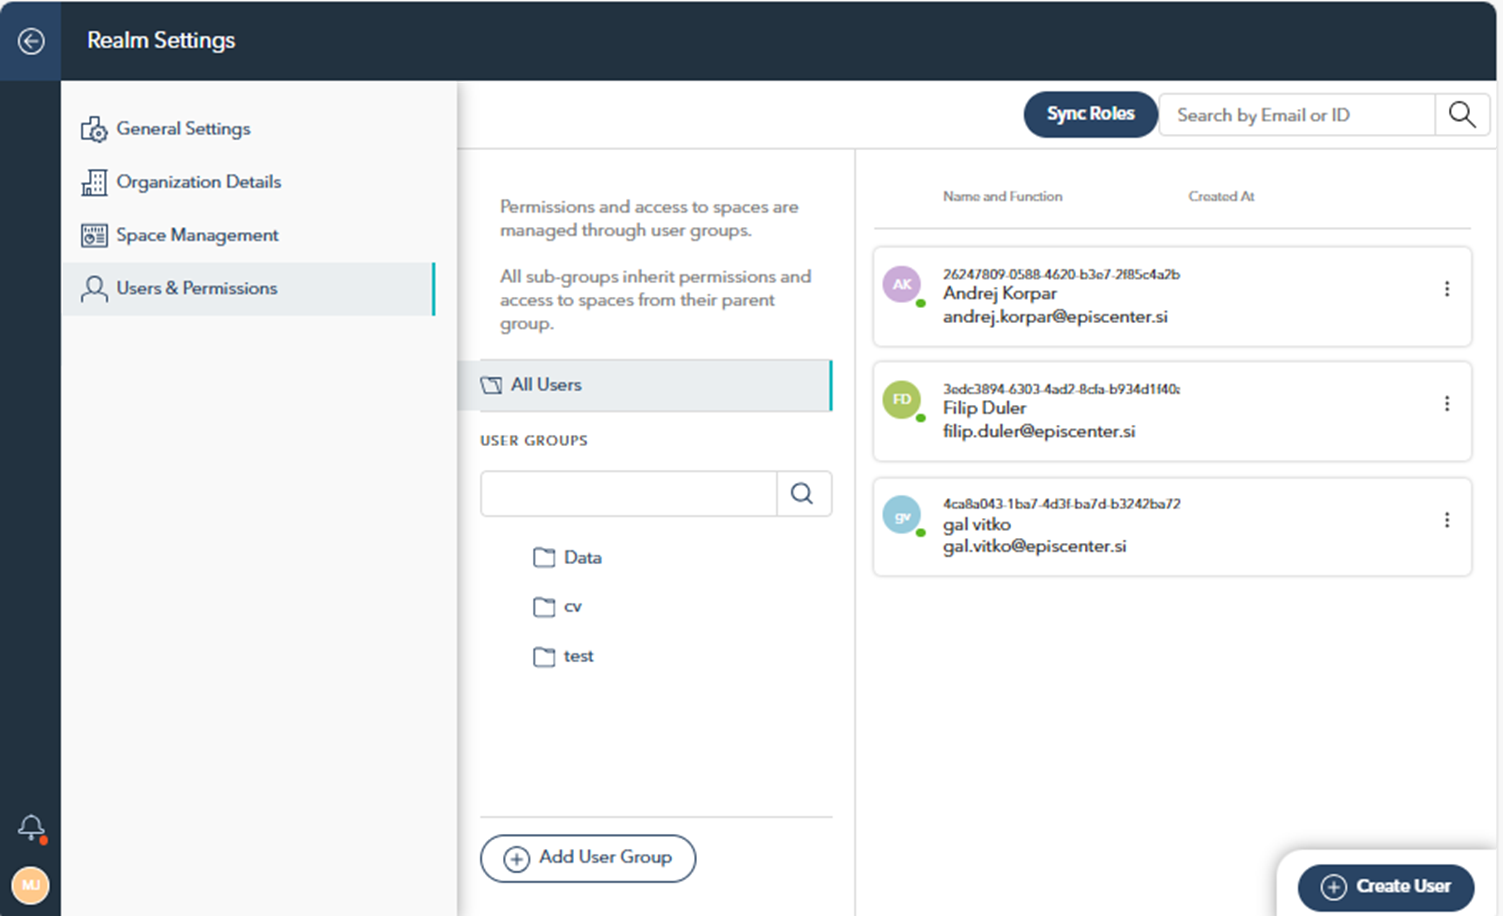
You can manage these groups by adding, editing, or deleting user groups.
Permissions and access to spaces are managed through user groups, where all sub-groups inherit permissions and access to spaces from their parent group
Managing User Groups
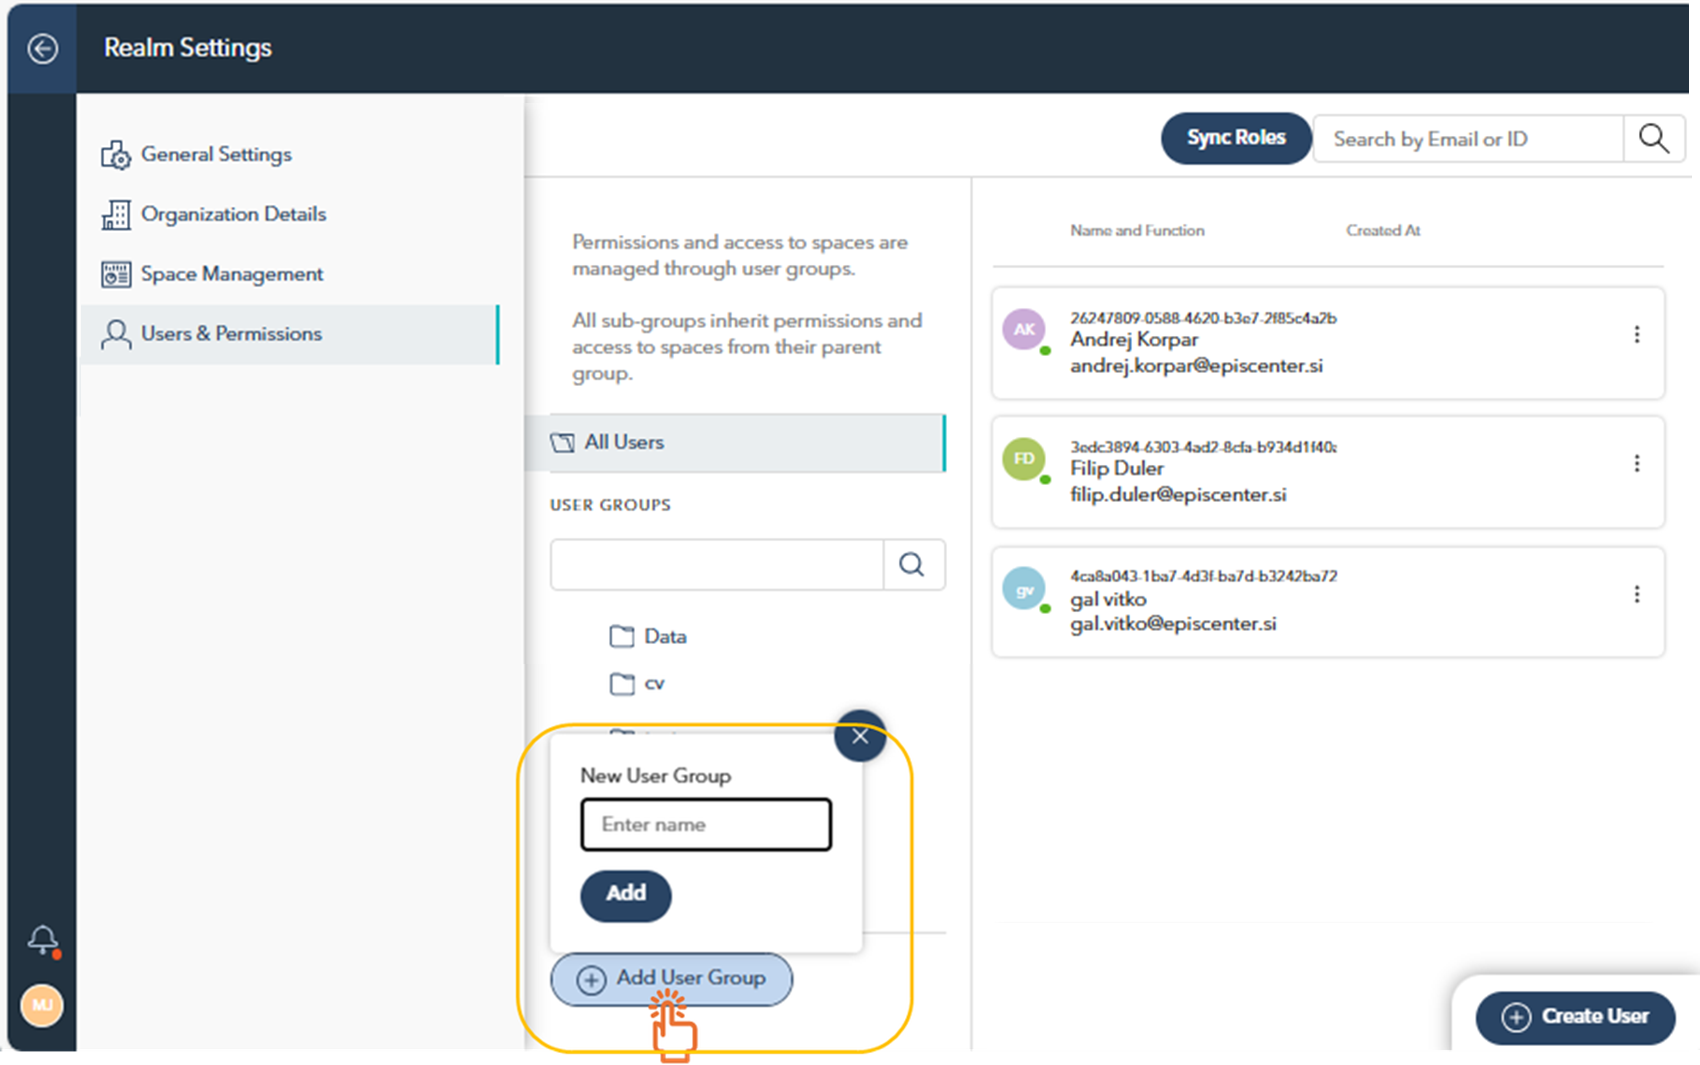
To create a new user group, click the Add User Group button located below the list of existing groups. A pop-up window will appear where you can enter the group's name and click Add to confirm.
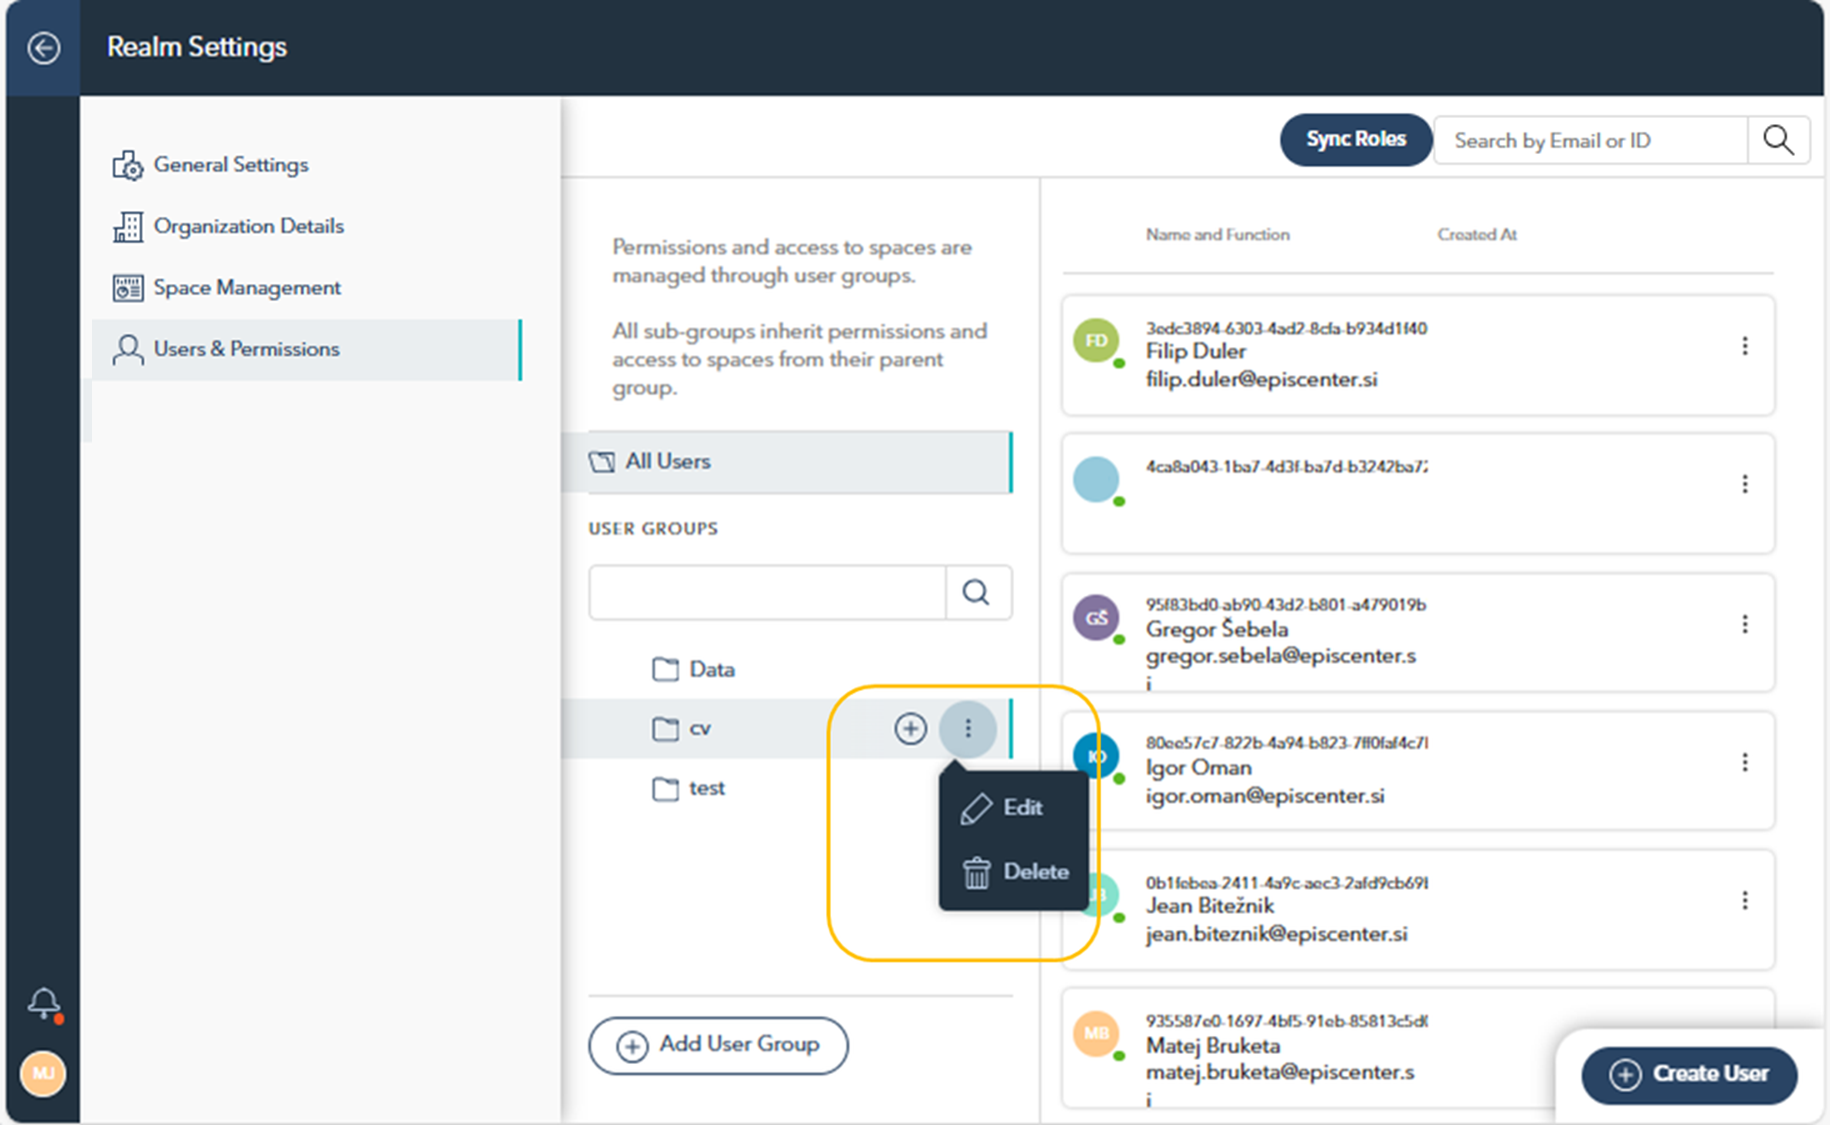
Edit or Delete a User Group: Hover over a user group and click on the three dots (•••) to either edit or delete the group.
When editing, you can provide a group description, select spaces that the group can access, and assign relevant permissions to the group.
Adding and Managing Users
Adding a New User
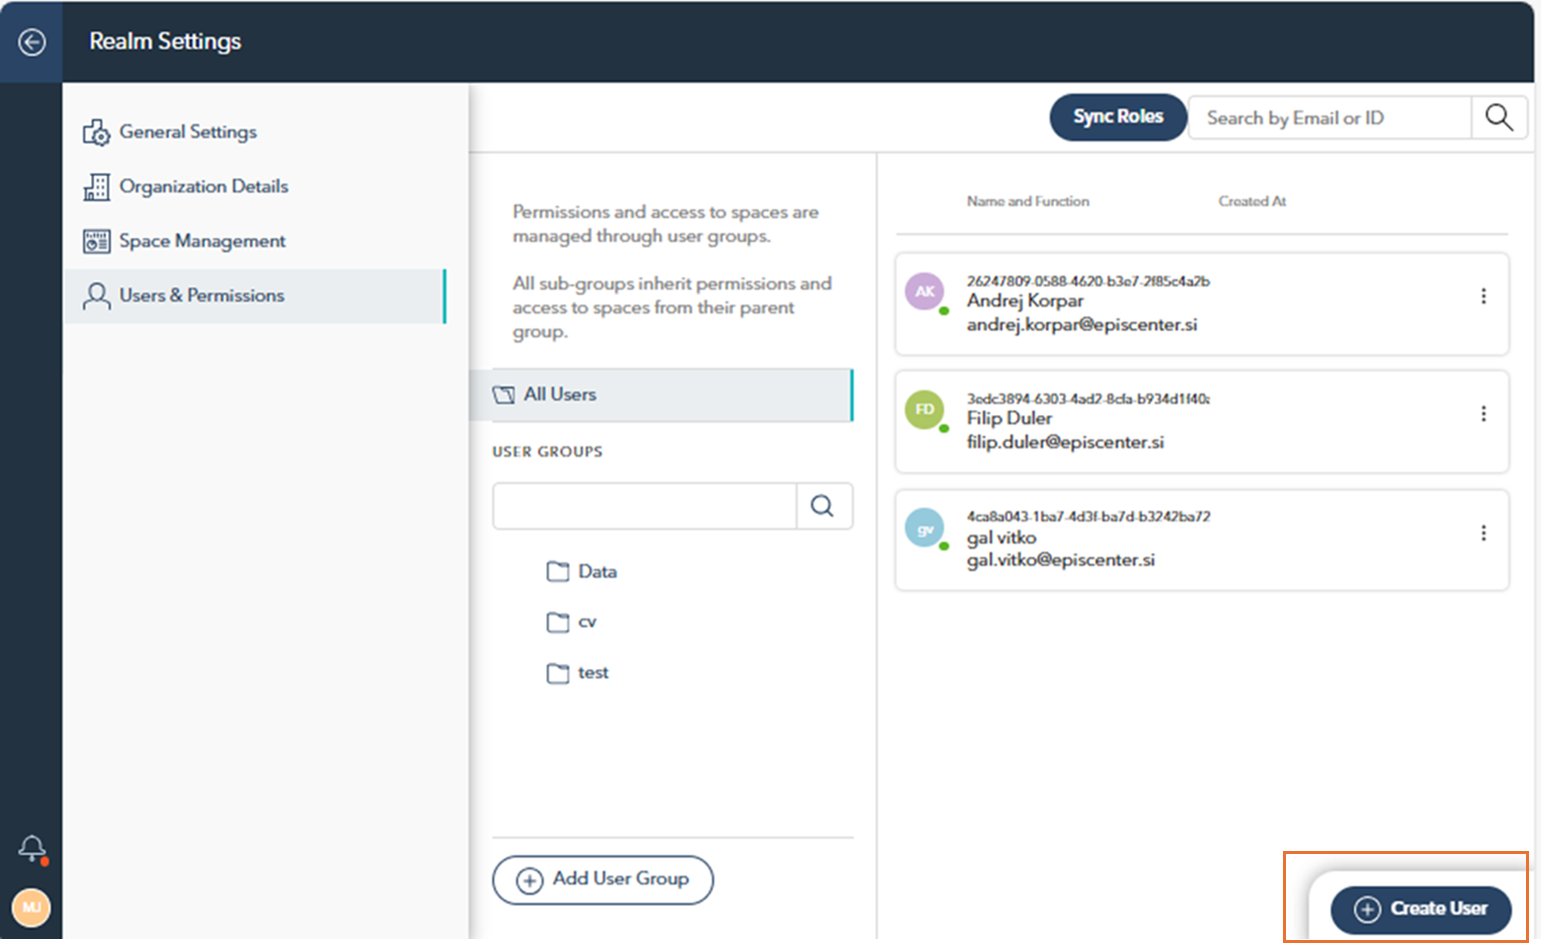
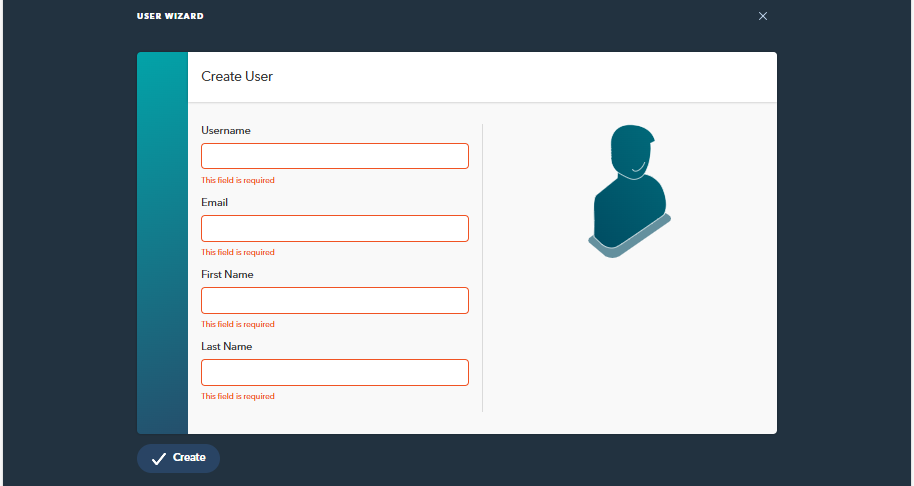
To add a new user, click on the Create User button in the bottom-right corner of the main Users & Permissions page. This opens the User Wizard, where you'll be prompted to enter the basic information about user.
User Wizzard
Username: The desired username for the user.
Email: The user's email address.
First Name & Last Name: The user's full name.
All fields are mandatory. Once filled in, click Create to add the user to the system.
Editing a User
When editing a user, several options are available for modifying user details, group memberships, and permissions.
To edit a user, click on the user's name from the list in the Users & Permissions section.
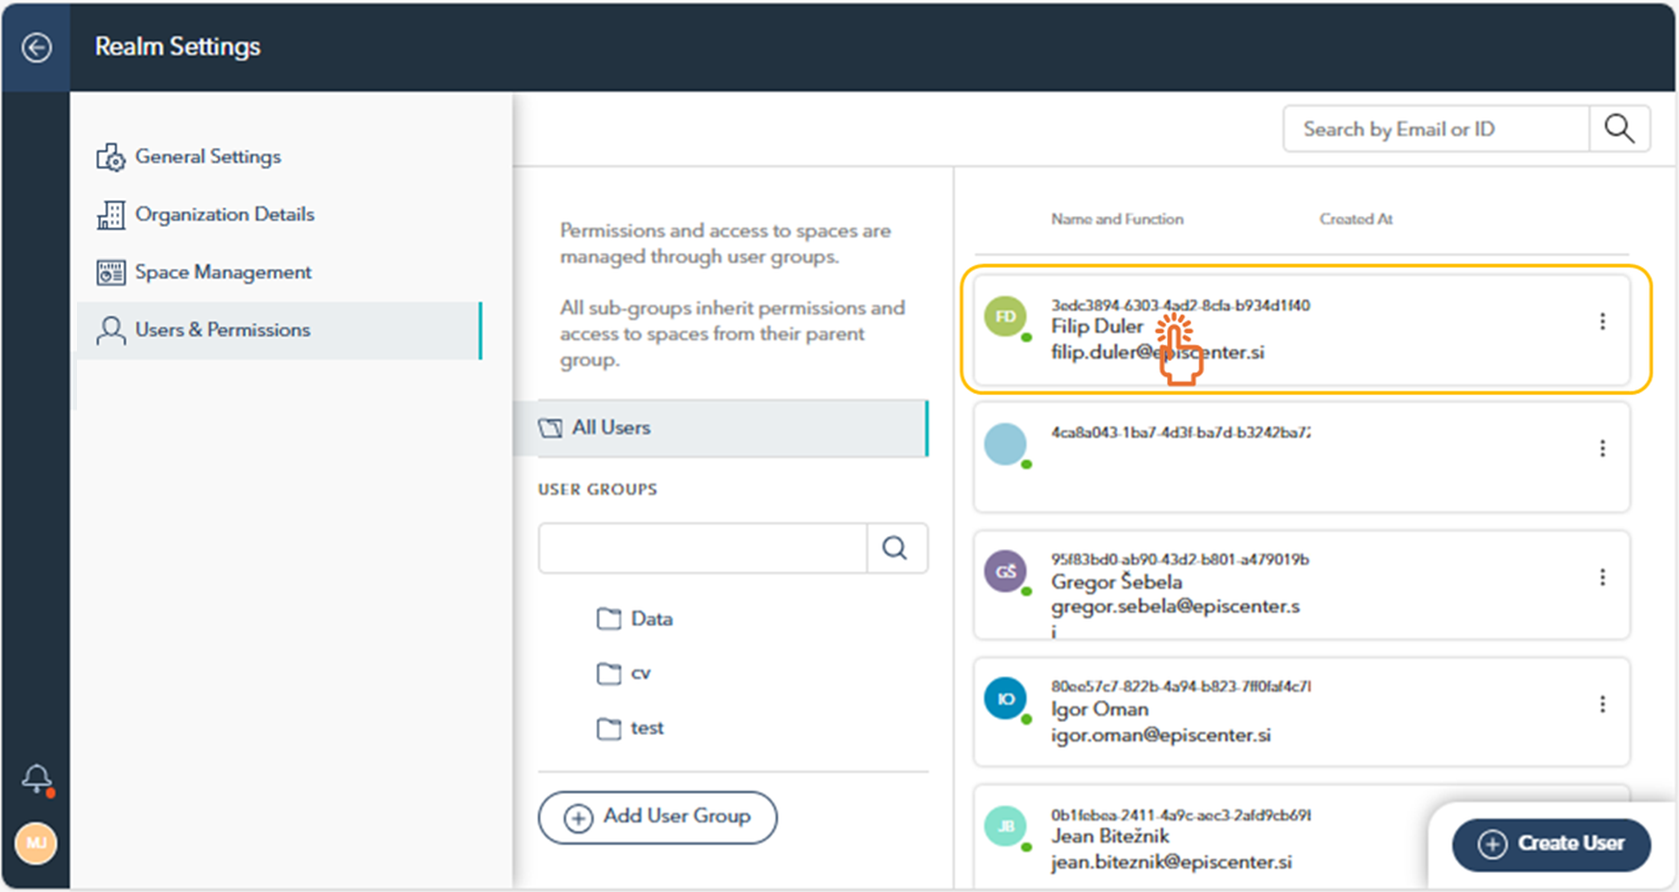
This will open the user details page, where you can view and edit.
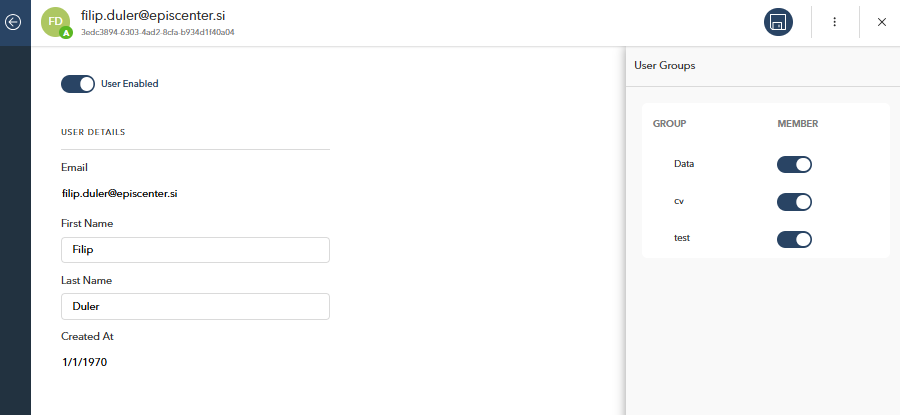
User Enabled Toggle: Located at the top left, this switch allows you to enable or disable the user account. When toggled off, the user will not be able to access the system.
Name: Edit the user's first and last name.
Created At: Shows the date when the user's account was created.
Email: Displays the user’s email address.

Once the user account is created, the email address cannot be changed. To update the email, you must delete the existing account and create a new one with the correct email address.

If a crossed-out email icon appears next to the address, it indicates that the email has not been verified yet.

Additionally:
Group Membership: On the right-hand side, you can view and manage the user's group memberships. Toggle the switches to enable or disable the user's membership in the available groups.
Additional Actions: In the top-right corner (under the three-dot menu), two additional actions are available: Show User Permissions and Send Reset Password
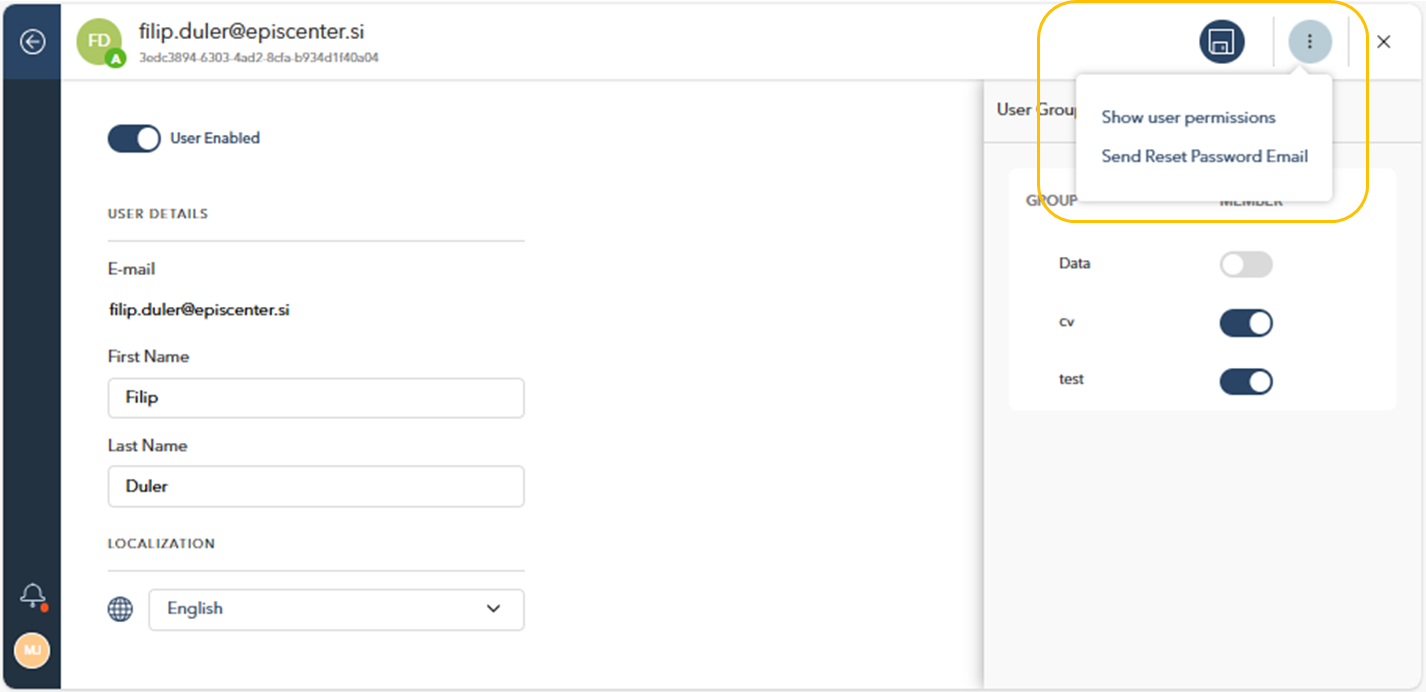
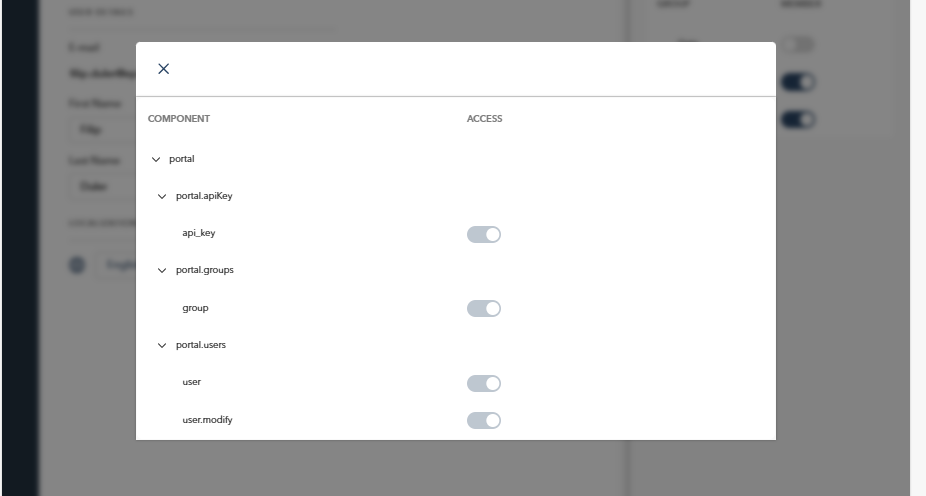
Show User Permissions: View detailed user permissions for different components of the platform. By selecting Show User Permissions, you can view and adjust specific permissions the user has across various components of the platform. Each permission is represented by a toggle switch, allowing you to enable or disable the following access rights:
API Key: Control access to API key management.
Groups: Manage the user’s ability to view and modify user groups.
Users: Adjust the user’s permissions related to user management.
Send Reset Password Email: Send an email to the user to reset their password.