
Adding / Importing Products
To efficiently manage your product catalog, the system allows you to either add individual products manually or import a list of products in bulk.
Adding a New Product
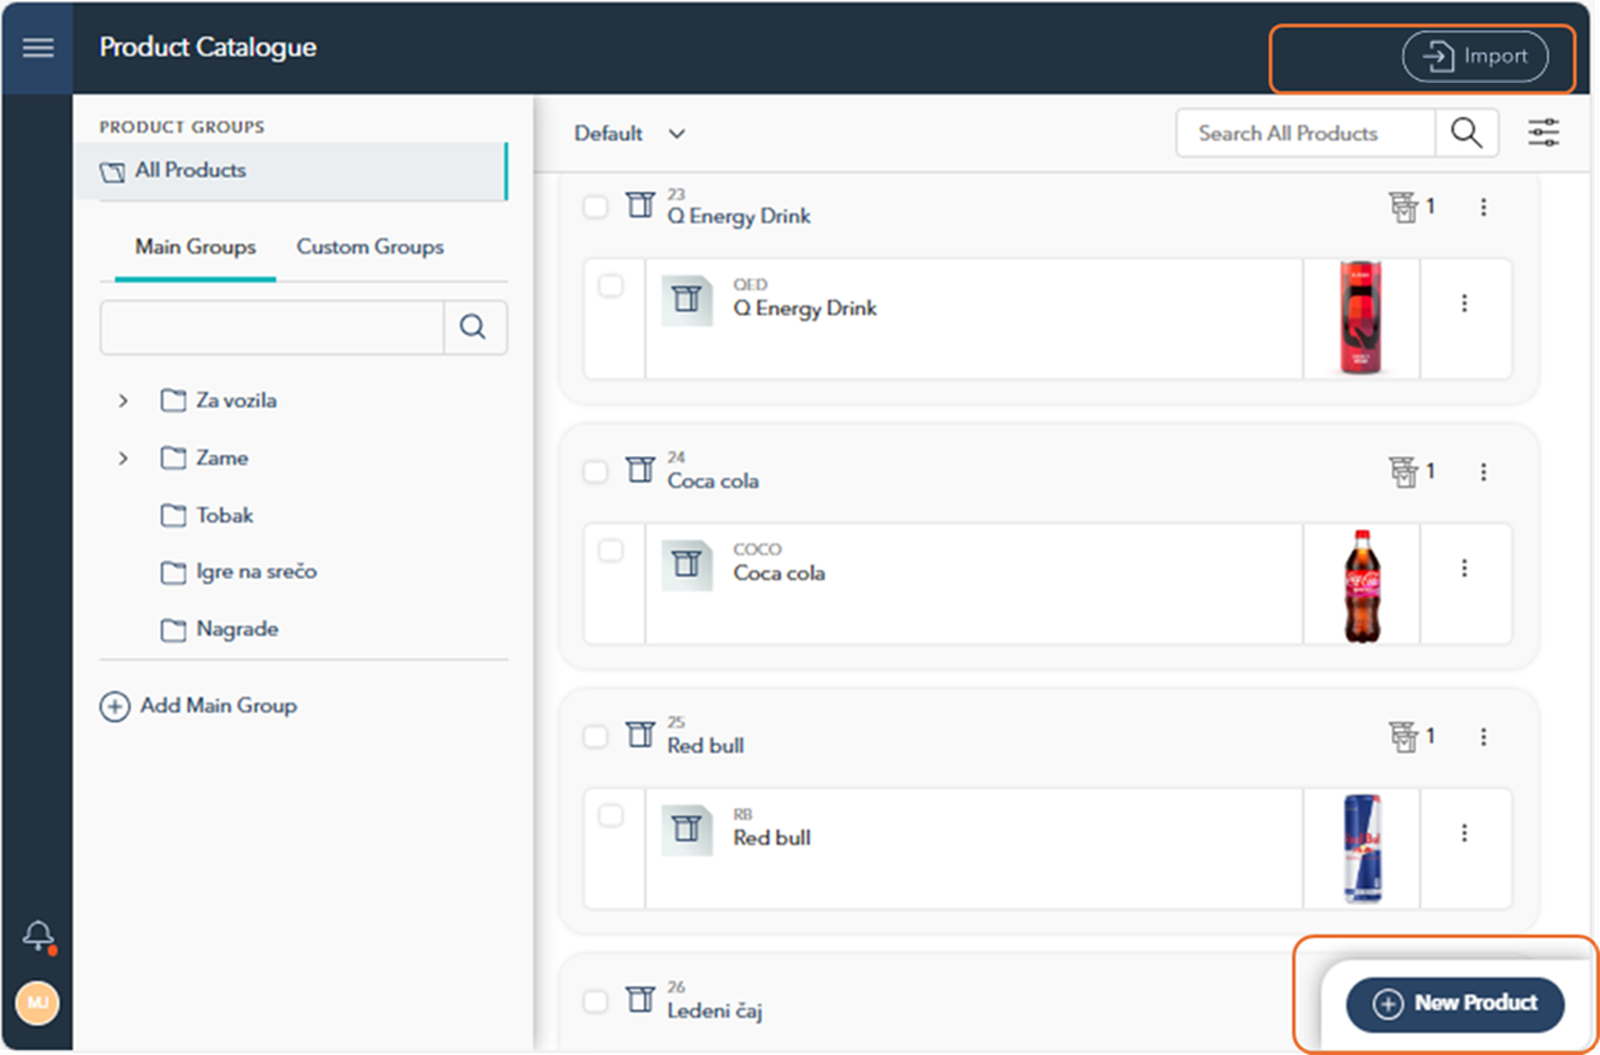
You can add a new product by clicking the "New Product" button located at the bottom-right corner of the screen. Once you click on the New Product button, the Product Wizard will guide you through the process of creating a new product.
Step 1: Enter Basic Product Information
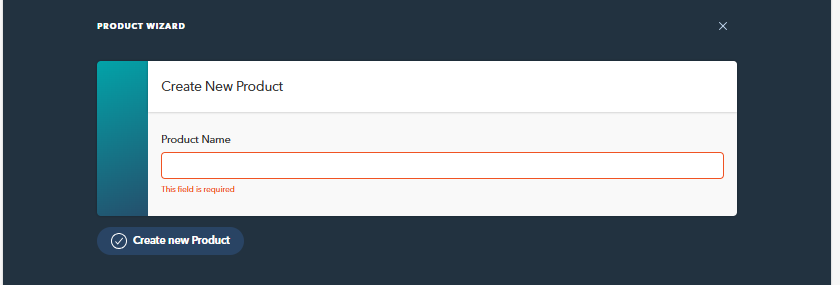
In the first step of the wizard, you'll be asked to provide the Product Name, which is a required field. After filling in the Product Name, click Create new Product to proceed.
Step 2: Add Custom Property
Once you've provided the Product Name and clicked Create new Product, you will be directed to the Product Properties tab. Here, you can define mandatory properties for all product variants and also add custom properties.
Add Custom Property: To add properties specific to your product, use the Add Custom Property section. You can either select from existing properties by clicking on the Choose dropdown or create a new property by selecting Create New Property.
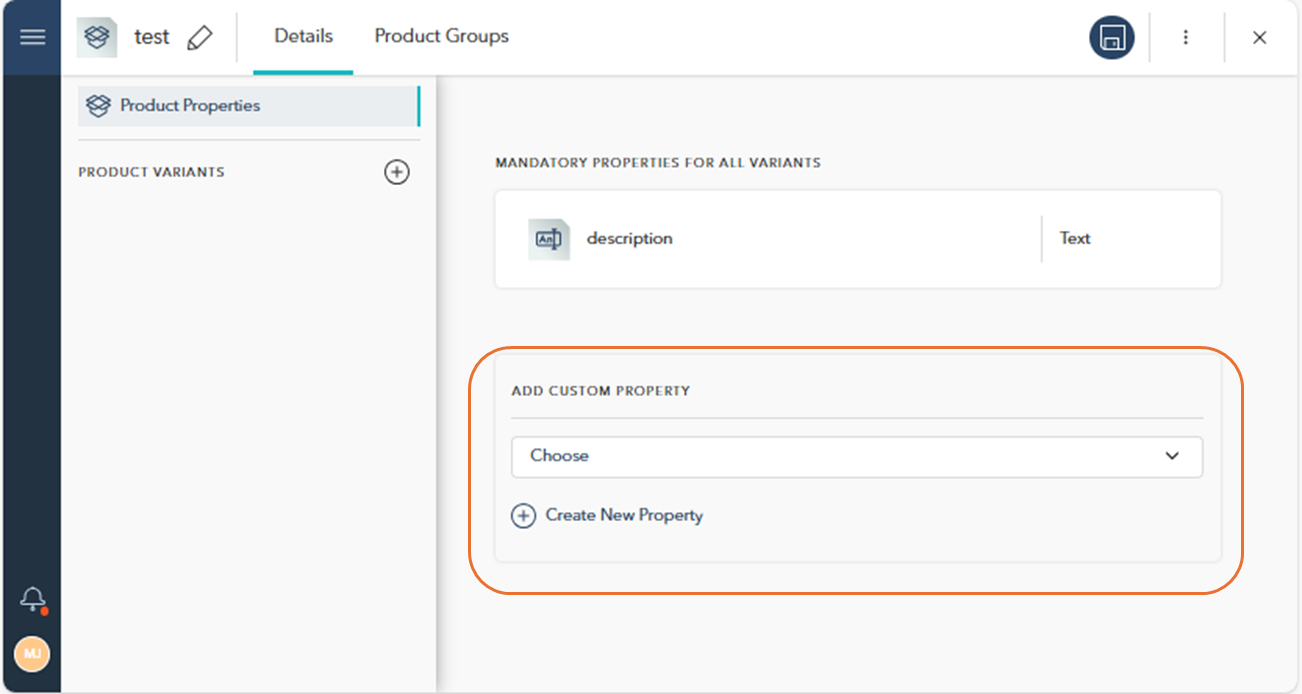

The options available in the Choose dropdown menu are properties that have been previously defined in the Space Settings section under Product Properties. If a desired property is not listed, you can define it directly by clicking on Create New Property. This will provide a shortcut to the Settings section, where you can create a new property
Importing Products
If you need to add multiple products at once, use the Import feature, accessible via the icon above the search bar (located in the upper-right corner of the page). This option allows you to upload a list of products, ensuring quick and accurate updates to your product catalog.
To import multiple products at once, follow these steps:
Step 1: Upload a CSV File
Click the "Upload CSV" button and select the appropriate file from your computer.
Once the file is uploaded, click Next to proceed.
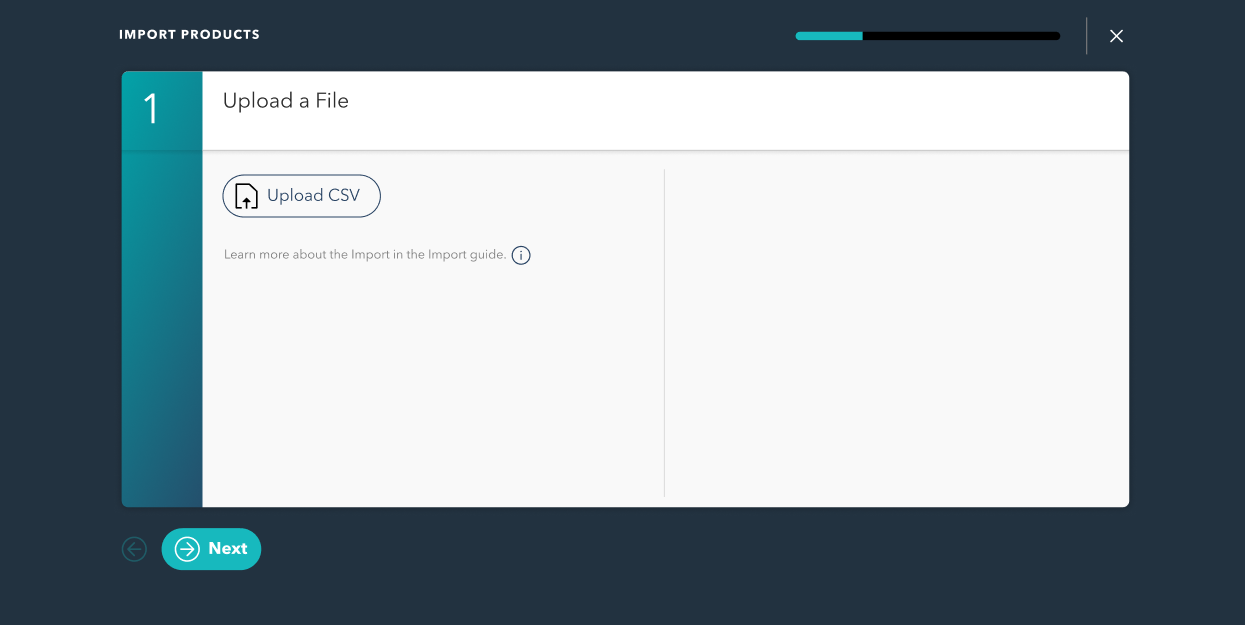
If you need more information about the CSV file format or how to structure your data, click on the information icon below the upload button to access the Import guide.
Step 2: Map Product Properties
After uploading the CSV file, the system will automatically read the columns in your file and prompt you to map them to the relevant product properties.
For each column in the CSV, select the appropriate Product Property from the dropdown menu.
Once all columns are correctly mapped to product properties, click Next to continue.
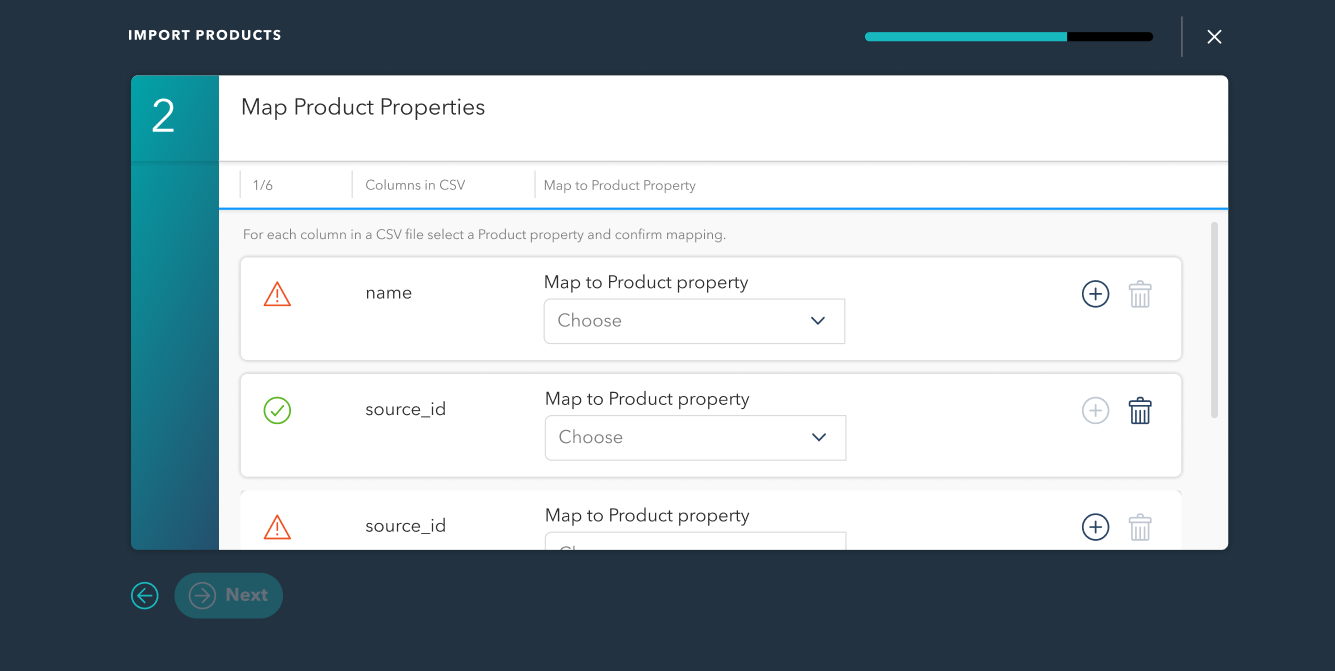
If any required fields are missing or incorrectly mapped, they will be highlighted with a warning icon, and you'll need to correct the mapping before proceeding.
Step 3: Import Summary
In the final step, the system will validate the CSV file and begin importing the data. You'll see a progress bar for both CSV file validation and Data Import.
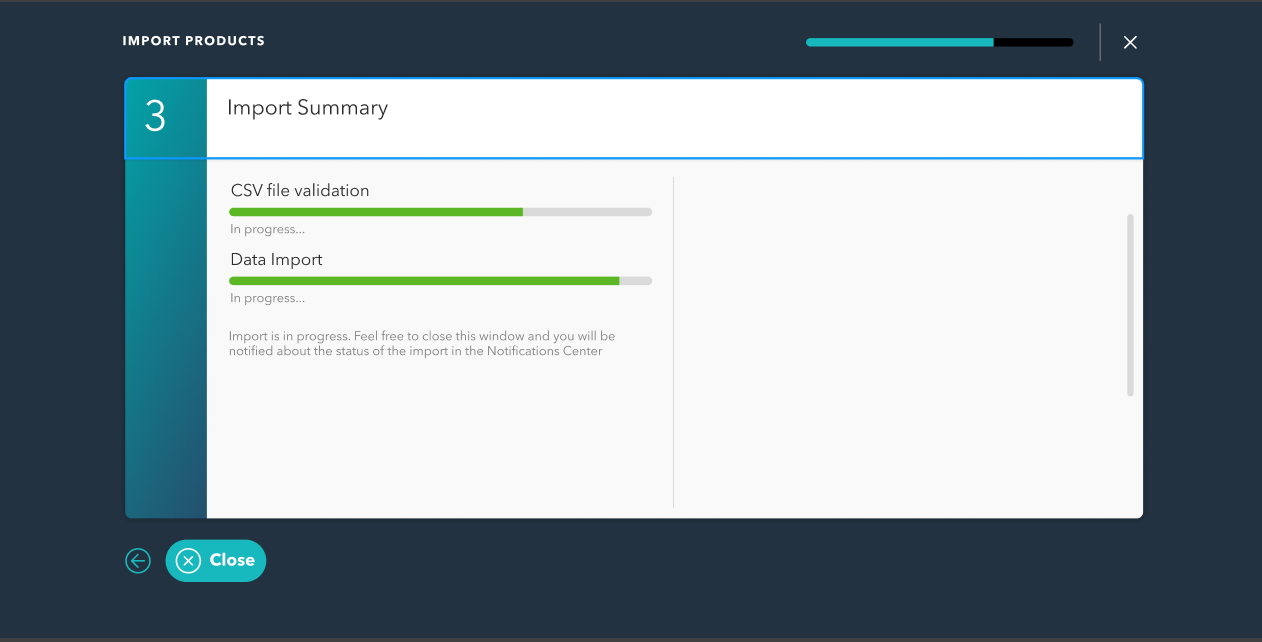
Once the import process is complete, you will be notified in the Notifications Center. You can close the window while the import is in progress, and the system will continue to import in the background.